Cleaning Sea Fishing Reels
Saltwater fishing reels are indispensable tools for anglers who seek the thrill of coastal and offshore fishing. These reels are specifically designed to withstand the harsh conditions and challenges presented by saltwater environments.
However, the corrosive nature of seawater can take its toll on these reels over time, compromising their performance and durability. To ensure optimal functionality and extend the lifespan of your saltwater fishing reels, regular cleaning and maintenance are of utmost importance.
In this article, we will delve into the significance of cleaning fishing reels and the numerous benefits that stem from consistent maintenance practices.
Importance of Cleaning Saltwater Fishing Reels
Safeguarding against Saltwater Corrosion:
Saltwater contains corrosive agents that can gradually deteriorate the materials comprising fishing reels. When exposed to the sea, reels accumulate salt deposits, which, if not adequately addressed, can lead to corrosion, rust, and irreversible damage.
By implementing a diligent cleaning routine, anglers effectively remove the salt residue, preventing it from corroding the reel’s critical components. Cleaning not only protects the reel’s structural integrity but also safeguards its optimal performance.
Preserving Optimal Performance
Regular cleaning plays a vital role in maintaining the performance and functionality of saltwater fishing reels. When debris, sand, salt, and dirt accumulate on the reel, they impede its smooth operation and can cause drag issues, decreased casting distance, and gear malfunctions.
Cleaning the reel after each sea angling excursion eliminates these performance-hindering elements, ensuring that the reel operates at its peak capacity. By removing accumulated grime and maintaining a clean reel, anglers can experience enhanced casting, smoother line retrieval, and improved drag control, resulting in a more enjoyable fishing experience.
Benefits of Regular Maintenance:
Prolonged Lifespan of Saltwater Fishing Reels:
Regular maintenance is a key factor in extending the lifespan of saltwater fishing reels. By implementing routine cleaning, anglers prevent the progressive corrosion and degradation that can significantly reduce the reel’s durability.
Cleaning removes the salt and other contaminants that cause damage, preserving the reel’s structural integrity and allowing it to withstand the rigors of saltwater environments for a more extended period. Ultimately, a well-maintained reel can provide years of reliable service and save anglers from the expense of frequent replacements.
Cost-Effective Approach:
Regular maintenance is a cost-effective approach to seawater fishing. By investing time in cleaning and maintenance, anglers can avoid costly repairs or replacements caused by neglect or irreversible damage.
Preventive maintenance not only safeguards the reel but also reduces the risk of potential breakdowns while on the water, preventing interruption of fishing trips and associated expenses.
Additionally, maintaining the reel’s optimal performance through regular cleaning can improve efficiency, potentially leading to a higher catch rate and a more satisfying fishing experience.
Essential Tools for Cleaning Saltwater Fishing Reels
Properly cleaning your fishing reel is crucial for maintaining its performance and prolonging its lifespan. To effectively clean your reel, you will need to gather a few essential cleaning supplies. In this part, we will explore the key items you need to have in your cleaning arsenal.
Soft Cloth or Sponge
A soft cloth or sponge is an essential tool for cleaning the exterior of your fishing reel. Opt for a non-abrasive cloth or sponge that won’t scratch or damage the reel’s surface. This tool will help remove dirt, grime, and salt deposits from the reel’s body and other external parts.
Freshwater
Freshwater is a vital component in the cleaning process. It serves as a rinse agent to remove cleaning solutions, salt, and debris from the reel. Ensure you have access to a clean source of freshwater, such as a sink, hose, or bucket, before you begin cleaning your reel.
Mild Dish Soap or Reel Cleaner
Mild dish soap or a specialised reel cleaner is essential for tackling stubborn stains and grime on your sea fishing reel. These cleaning agents are designed to cut through grease and remove salt residue effectively. Dilute a small amount of mild dish soap in water or follow the instructions on the reel cleaner product for optimal usage.
Toothbrush or Small Brush
A toothbrush or a small brush with soft bristles is invaluable when it comes to cleaning the hard-to-reach areas of your reel. Use the toothbrush or brush to gently scrub the gears, bearings, and other intricate components to remove dirt, salt, and debris. Be careful not to apply too much pressure to avoid causing damage.
Cotton Swabs
Cotton swabs are handy for cleaning small, tight spaces where your fingers or a brush cannot reach. They are particularly useful for cleaning around buttons, knobs, and other delicate parts of your saltwater fishing reel. Dip the cotton swab in a mild cleaning solution or freshwater to gently remove dirt and grime.
Reel Lubricant
Reel lubricant is not only for cleaning but also for maintaining the smooth operation of your reel. After cleaning, apply a small amount of reel lubricant to the gears, bearings, and other moving parts to reduce friction and ensure optimal performance. Choose a reel lubricant specifically formulated for saltwater environments to provide superior protection against corrosion.
By gathering these essential cleaning supplies, you will be well-prepared to effectively clean and maintain your reel. Remember to follow the manufacturer’s guidelines and recommendations for cleaning and lubricating your specific reel model to ensure the best results.
Regular cleaning and maintenance are key to keeping your reel in top shape, extending its lifespan, and enjoying many successful fishing trips in the seawater environment.
Preparing Your Fishing Reel for Cleaning
Fishing reels are integral to the success of any angler, enabling smooth casting and reeling in the big catch. However, before you embark on the task of cleaning, it is essential to prepare it properly. In this section, we will focus on two crucial steps in preparing it for cleaning: removing the fishing line and unscrewing the handle. By following these steps, you will ensure a thorough and effective cleaning process for your prized fishing gear.
Removing the Fishing Line
Before delving into the cleaning process, it is necessary to remove the fishing line. This step allows for better access to the components and prevents any damage or tangling of the line during cleaning.
Follow these steps to safely remove the fishing line from your reel:
- Loosen the drag: Adjust the drag on your reel to its loosest setting. This reduces tension on the line and facilitates smooth removal.
- Locate the line attachment point: Identify the point where the fishing line is attached to the reel. It is typically located near the spool.
- Unwind the line: Begin unwinding the line by turning the handle. Keep a firm grip on the line to prevent it from tangling or becoming loose.
- Store the fishing line: Once the line is completely unwound, carefully store it for future use or proper disposal. Consider using a line spooler or winder for organised storage.
Unscrewing the Reel Handle
The handle is an essential component that facilitates the retrieval of the fishing line. To effectively clean it, it is necessary to unscrew the handle and separate it from the main body.
Here’s how to accomplish this step:
- Locate the handle screw: On the side of the reel, identify the handle screw. It is typically located near the base of the handle.
- Choose the appropriate tool: Depending on the type of screw used, select the appropriate tool for unscrewing. Common options include screwdrivers, Allen wrenches, or specialised reel handle removal tools.
- Apply steady pressure: Place the tool securely on the screw and apply gentle pressure in a counter clockwise direction. Ensure that the tool fits snugly to avoid damaging the screw head.
- Unscrew the handle: Slowly rotate the tool counter clockwise to loosen and remove the screw. Place the screw in a safe location to avoid misplacement.
- Separate the handle: Once the screw is removed, gently separate the handle from the reel body. Take note of any washers or additional components present.
By successfully removing the fishing line and unscrewing the handle, you have completed the necessary preparation steps to clean your reel effectively. These steps allow for better access to all parts ensuring a thorough cleaning process that will improve its performance and longevity.
Remember, proper cleaning and maintenance are essential to keep your saltwater fishing reel in top shape. Stay tuned for the next instalment in our comprehensive guide, where we will explore the steps involved in cleaning the exterior of your reel and providing it with the care it deserves.
Cleaning the Exterior
Saltwater fishing reels are constantly exposed to the harsh elements of the sea, leading to the accumulation of salt, dirt, and debris on their exterior surfaces. Properly cleaning the exterior of your reel is crucial for maintaining its performance and extending its lifespan. In this part, we will guide you through the step-by-step process of cleaning the exterior of your reel, ensuring that it remains in optimal condition for your future fishing adventures.
Dampen the Cloth or Sponge with Freshwater
Before you begin cleaning the exterior of your reel, dampen a soft cloth or sponge with freshwater. Make sure the cloth or sponge is not excessively wet to prevent water from seeping into the internal components.
Gently Wipe Down the Exterior of the Reel
Using the damp cloth or sponge, gently wipe down the entire exterior. Start with the body, handle, spool, and other visible parts. Apply light pressure to remove surface dirt, salt residue, and any other debris that may have accumulated.
Pay Attention to Salt Deposits or Debris
While wiping it down, pay close attention to areas where salt deposits or debris tend to accumulate. These areas include crevices, corners, and around the drag system. Take your time to ensure thorough cleaning and removal of any visible salt or debris.
Use Mild Dish Soap for Stubborn Stains if Needed
In the case of stubborn stains or salt deposits that are difficult to remove, you can use a mild dish soap or reel cleaner. Apply a small amount of the soap or cleaner to the damp cloth or sponge and gently rub the affected areas. Be cautious not to use excessive force or abrasive materials that could damage the reel’s finish.
Rinse the Reel with Freshwater and Pat Dry
Once you have wiped down the reel and removed any stains or salt deposits, rinse the entire reel with freshwater. Use a gentle stream of water to ensure all soap residue and remaining debris are washed away. After rinsing, use a dry cloth to pat dry. Pay special attention to areas where water tends to accumulate, such as crevices and joints, to prevent any potential damage caused by prolonged exposure to moisture.
Cleaning the exterior of your reel is an important maintenance task that helps prevent salt corrosion, removes dirt and debris, and ensures the reel’s longevity and optimal performance. By following the steps outlined in this section, including dampening the cloth, gentle wiping, paying attention to salt deposits, using mild dish soap for stubborn stains, rinsing with freshwater, and patting it dry, you can effectively clean the exterior and be better prepared for your next fishing excursion.
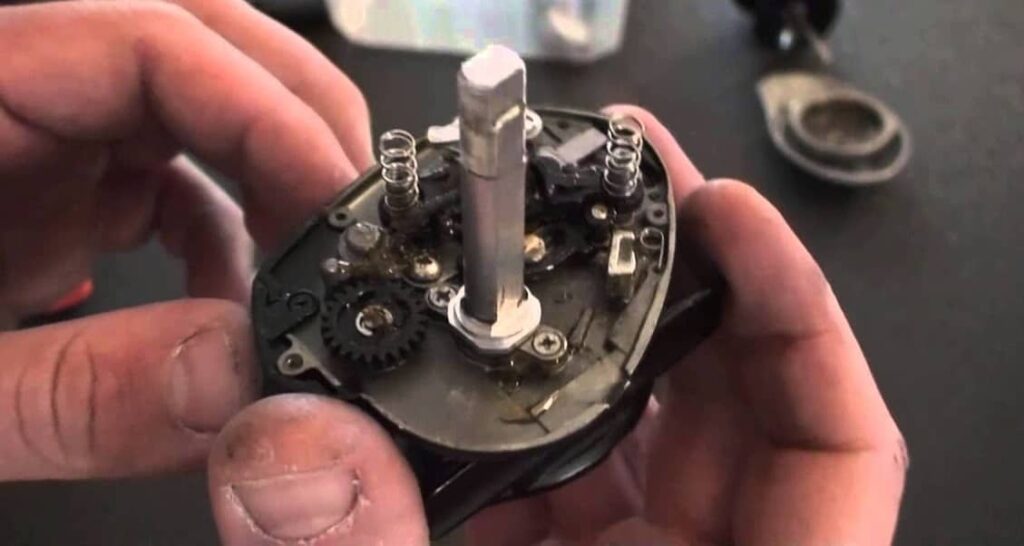
Disassembling the Reel
Disassembling a fishing reel is a crucial step in proper maintenance and cleaning. By following the manufacturer’s instructions and keeping track of small parts, you can ensure a smooth disassembly process and avoid any complications that may arise. In this part, we will delve into the importance of disassembling a reel, the significance of following instructions, and the need to keep track of small parts.
Follow the Manufacturer’s Instructions for Disassembly
Every fishing reel is unique, and manufacturers provide specific instructions on how to disassemble their reels. It is crucial to familiarise yourself with these instructions before attempting to disassemble your reel.
Here’s why following the manufacturer’s instructions is essential:
- Ensuring Proper Technique: The manufacturer’s instructions are designed to guide you through the disassembly process with precision. They outline the correct techniques, tools, and precautions required for safe and efficient disassembly. Deviating from these instructions can result in damage to the reel or its components.
- Preventing Warranty Void: Some manufacturers have specific guidelines for maintenance. If you attempt to disassemble the reel without following their instructions, you may unintentionally void the warranty. By adhering to the provided guidelines, you can maintain the warranty coverage and seek professional assistance if needed.
- Understanding Unique Features: They often have unique features and mechanisms that require specialised disassembly techniques. Following the manufacturer’s instructions ensures that you are aware of these features and can disassemble the reel accordingly, avoiding any mishaps or damage.
Keep Track of Small Parts and Their Order
Disassembling a fishing reel involves handling several small parts, such as screws, washers, springs, and gears. It is crucial to keep track of these parts and their order to facilitate the reassembly process and maintain the reel’s functionality.
Here’s why it is essential to keep track of small parts:
- Ensuring Proper Reassembly: Disassembling a reel is only half the task; reassembling it correctly is equally important. By organising and noting the order of the small parts as you remove them, you can easily replicate the original configuration during reassembly. This ensures that it functions smoothly and prevents any issues or malfunctions.
- Minimising Loss or Misplacement: Small parts can easily get misplaced or lost during the disassembly process. By keeping track of these parts, you reduce the risk of misplacing them or inadvertently leaving them out, which could compromise the performance.
- Simplifying Future Maintenance: Keeping track of the order and placement of small parts creates a reference for future maintenance and repairs. If you encounter any issues or need to replace a component, having a record of the original arrangement will simplify the process and save time.
Tips for Keeping Track of Small Parts
- Use a small tray or magnetic mat: Place small parts in a designated tray or use a magnetic mat to keep them organised and prevent them from rolling or getting lost.
- Take clear photographs: Capture clear images of the reel and its disassembled parts from multiple angles. These photographs can serve as a visual guide during reassembly.
- Label or group parts: Use small containers or resealable bags to group similar parts together. Labelling them or using separate containers for each section of the reel can further aid in organisation.
Disassembling a fishing reel according to the manufacturer’s instructions and keeping track of small parts are crucial steps in proper maintenance. By following the provided guidelines, you ensure the reel’s integrity, maintain warranty coverage, and prevent any damage during disassembly. Additionally, keeping track of small parts simplifies the reassembly process and ensures it functions optimally. By giving due attention to these aspects, you can extend the lifespan of your fishing reel and enjoy many successful.
The Best Multiplier Reels Reviewed
Cleaning the Internal Components
Cleaning the internal components of your saltwater fishing reel is a crucial step in its maintenance routine. This process not only helps remove dirt, salt, and debris but also ensures the smooth functioning and longevity of your reel. In this section, we will provide a step-by-step guide on how to effectively clean the internal components, paying special attention to gears, bearings, and other moving parts, while utilising a mild reel cleaner solution, toothbrush or small brush, and cotton swabs.
Soak the Components in a Mild Reel Cleaner Solution
- Prepare a mild cleaner solution following the product instructions.
- Submerge internal components, such as gears, bearings, and other removable parts, in the solution.
- Allow the components to soak for the recommended duration, which is typically indicated on the cleaner packaging.
- Ensure that all parts are fully immersed in the solution to facilitate thorough cleaning.
Use a Toothbrush or Small Brush to Remove Dirt and Salt
- After soaking, take a toothbrush or small brush and gently scrub the components.
- Pay close attention to the gears, bearings, and other moving parts, as they tend to accumulate dirt and salt.
- Use gentle circular motions to dislodge any debris or grime from the surfaces.
- Be cautious not to apply excessive pressure, as it may damage delicate components.
Pay Attention to Gears, Bearings, and Other Moving Parts
- Focus on the gears, as they are crucial for the smooth operation of your reel.
- Inspect the teeth of the gears for any debris or salt build up and use the toothbrush or small brush to remove them.
- Similarly, clean the bearings meticulously, ensuring they rotate smoothly and are free from dirt or salt particles.
- Take note of any damaged or worn-out gears or bearings, as they may require replacement.
Use Cotton Swabs for Hard-to-Reach Areas
- For intricate or hard-to-reach areas, employ cotton swabs soaked in the reel cleaner solution.
- Gently manoeuvre the cotton swabs to clean crevices, recesses, or small openings where dirt or salt might have accumulated.
- Pay particular attention to areas around screws, handles, drag systems, and other intricate parts.
- Replace the cotton swabs as needed to maintain cleanliness throughout the process.
Cleaning the internal components of your reel is essential for maintaining its optimal performance and prolonging its lifespan. By following the steps outlined above, which involve soaking the components in a mild cleaner solution, using a toothbrush or small brush to remove dirt and salt, and utilising cotton swabs for hard-to-reach areas, you can ensure a thorough and effective cleaning process. Regular maintenance of internal components will enhance its functionality, minimise the risk of corrosion, and contribute to many successful and enjoyable fishing experiences.
Rinsing and Drying
After cleaning the exterior and internal components of your reel, it is crucial to complete the maintenance process with proper rinsing and drying techniques.
This final stage ensures that all cleaner residue, debris, and moisture are effectively removed, preserving the reel’s performance and protecting it from potential damage. In this part, we will delve into the essential steps for rinsing and drying your sea fishing reels to help you maintain their optimal functionality.
Rinse the Components Thoroughly with Freshwater
Once you have completed the cleaning process, it is important to rinse all the components thoroughly with freshwater. This step removes any remaining cleaner residue, dirt, or salt particles that may still be clinging to the reel. Use a gentle stream of freshwater, such as from a faucet or hose, and direct it towards the various parts, ensuring thorough coverage.
Ensure All Cleaner and Debris are Removed
While rinsing, pay close attention to each component, including gears, bearings, spool, and the body. Use your fingers or a soft brush to dislodge any stubborn residue or debris. Rotate the gears and spool to ensure that water reaches all crevices and removes any remaining dirt or cleaner solution. Take care to rinse off any areas where cleaner may have accumulated, as leftover residue can potentially damage the reel if not thoroughly removed.
Allow the Components to Air Dry Completely
After rinsing, it is essential to let the reel components air dry completely. Place the parts on a clean, dry towel or paper towels, allowing them to sit undisturbed until all moisture evaporates. This process typically takes a few hours or overnight, depending on the humidity level and air circulation in your location.
Avoid the temptation to use heat sources such as hairdryers or direct sunlight to expedite the drying process, as excessive heat can damage delicate reel components. Patience is key here, as allowing the reel to air dry naturally ensures that all moisture evaporates, preventing potential issues like corrosion or water damage.
Proper rinsing and drying of your saltwater reels are crucial steps in maintaining their performance and prolonging their lifespan. Thoroughly rinsing off any cleaner residue, debris, and salt particles ensures it is clean and free from potential contaminants. Allowing the components to air dry completely guarantees the removal of moisture, protecting it from damage caused by corrosion or water accumulation. By following these essential steps, you can confidently store your saltwater reel, knowing that it is properly cleaned and ready for your next fishing adventure.
Lubrication and Reassembly
Proper lubrication and reassembly are critical steps in maintaining the performance and longevity. Lubricating the gears and bearings, following the manufacturer’s guidelines, and reassembling it correctly are essential for ensuring smooth operation and preventing unnecessary wear and tear. In this part, we will delve into the importance of lubrication, provide guidance on applying lubricant, and outline the proper reassembly process for your reel.
Apply a Small Amount of Reel Lubricant to Gears and Bearings
Lubrication plays a vital role in reducing friction and preventing damage to the intricate components of your fishing reel.
Here’s how you can effectively lubricate the gears and bearings:
- Assess the lubrication points: Identify the specific areas where lubrication is recommended. These usually include the gears, bearings, and other moving parts.
- Select the appropriate reel lubricant: Choose a high-quality lubricant that is specifically formulated for fishing reels. Consult the manufacturer’s recommendations or seek advice from knowledgeable professionals to ensure you choose the right product.
- Apply a small amount of lubricant: Using a clean, lint-free cloth or a designated applicator, apply a small amount of lubricant to the gears and bearings. Be cautious not to over-lubricate, as excessive lubrication can attract dirt and impede performance.
- Spread the lubricant evenly: Gently rotate the gears and move the handle to distribute the lubricant evenly across the gears and bearings. This ensures that all moving parts receive adequate lubrication for smooth operation.
Follow the Manufacturer’s Guidelines for Lubrication
Every fishing reel is unique, and manufacturers provide specific guidelines for lubrication. Adhering to these guidelines ensures that you apply the right type and amount of lubricant for your reel.
Here’s how you can effectively follow the manufacturer’s guidelines:
- Refer to the reel’s manual or documentation: Consult the manufacturer’s instructions for lubrication, as they provide valuable insights into the specific lubricants and techniques recommended for your reel model.
- Take note of recommended lubrication intervals: Manufacturers often recommend lubricating them at regular intervals or after a certain number of fishing trips. Follow these guidelines to maintain optimal performance.
- Pay attention to specific lubrication points: Manufacturers may highlight specific areas or components that require lubrication. Take note of these recommendations to ensure comprehensive lubrication.
Reassemble the Reel in the Correct Order
Once you have completed the lubrication process, it’s essential to reassemble your saltwater fishing reel correctly to ensure its proper functioning.
Here are the steps to follow:
- Refer to the disassembly notes: If you disassembled the reel earlier, consult your notes or refer to the manufacturer’s instructions to guide you through the reassembly process. Ensure you have all the parts needed for reassembly.
- Arrange the parts in the correct order: Arrange the components in the same order they were removed during disassembly. This helps prevent confusion and ensures that all parts fit together properly.
- Securely fasten all screws and bolts: Carefully tighten all screws and bolts to the recommended torque specifications. Be cautious not to overtighten, as it can damage the reel or impede its performance.
- Test the reel’s functionality: Once reassembled, give the reel a thorough test. Check that the handle rotates smoothly, the drag system engages properly, and all other functions operate as expected.
Lubrication and reassembly are essential steps in maintaining the performance and longevity of your reel. Applying the appropriate amount of lubricant to gears and bearings reduces friction and safeguards against corrosion. By following the manufacturer’s guidelines and reassembling it in the correct order, you ensure optimal functioning and extend the lifespan of your reel.
Testing and Final Steps
After diligently cleaning and maintaining your saltwater fishing reel, there are a few crucial steps to take to ensure its proper functionality and longevity. In this section, we will discuss the testing and final steps that will help you gauge the effectiveness of your cleaning efforts and safeguard your reel for future fishing expeditions.
Reattach the Reel Handle
Once your reel has been thoroughly cleaned and dried, it’s time to reattach the handle. Locate the handle’s corresponding attachment point on the reel and securely screw it back into place. Ensure that the handle is tightly fastened, as any looseness may affect its performance during fishing.
Spool the Fishing Line Back Onto the Reel
With the handle securely reattached, it’s time to spool the fishing line back onto the reel. Start by threading the end of the fishing line through the rod guides and the reel’s line roller. Secure the line onto the spool with an arbour knot or the recommended method for your specific reel. Slowly wind the line onto the spool, applying even tension to prevent line twists or knots. Fill the spool to the appropriate capacity recommended by the manufacturer.
Test the Reel’s Performance and Functionality
Testing the reel’s performance is a critical step to ensure that it functions optimally after the cleaning process. Find an open area, preferably near a body of water, where you can safely test your reel without obstruction.
- Casting Test: Engage the reel’s bail arm or release the line using the appropriate mechanism for your reel type. Hold the rod and simulate a casting motion, making sure the line smoothly leaves the spool and travels a good distance. Pay attention to any abnormalities, such as line tangling, uneven drag, or resistance during the casting motion.
- Retrieve Test: Engage the reel’s handle and start retrieving the line. Observe the reel’s operation for any signs of resistance, noise, or jerky movements. A properly cleaned and maintained reel should provide smooth and effortless retrieval.
- Drag Test: Engage the drag system and adjust it to the desired setting. Apply consistent pressure to the line by pulling it against the drag. The drag should engage smoothly and offer consistent resistance. If the drag feels uneven or slips under light pressure, further adjustments or maintenance may be required.
- Reel Functionality: Operate any additional features of your reel, such as anti-reverse mechanisms, line counters, or bait clickers, if applicable. Ensure that these features function correctly and smoothly.
Store the Reel in a Cool, Dry Place
Once you have tested the reel’s performance and functionality, it’s time to store it properly. Storing your reel in the right conditions will help maintain its longevity and protect it from potential damage.
- Clean and Dry: Before storing the reel, ensure that it is completely dry to prevent any moisture-related issues such as rust or mold. Use a clean cloth to wipe down the exterior, removing any remaining moisture.
- Cool and Dry Environment: Store it in a cool, dry place away from direct sunlight and extreme temperature fluctuations. Excessive heat and humidity can deteriorate the reel’s components and cause damage over time.
- Protective Cover: Consider using a protective cover or case to shield it from dust, dirt, and potential impacts during storage. This additional layer of protection can help prolong the reel’s lifespan.
The testing and final steps of cleaning your sea fishing reel play a crucial role in ensuring its optimal performance and longevity. By reattaching the handle, spooling the fishing line properly, conducting performance tests, and storing it in a cool, dry place, you are safeguarding your investment and setting yourself up for successful fishing trips in the future. Regular maintenance and proper storage will help your fishing reel remain in excellent condition, allowing you to enjoy many memorable moments on the water.
Maintenance Tips for Saltwater Fishing Reels
Saltwater fishing reels are essential tools for anglers who enjoy the challenges and rewards of seawater fishing. To ensure the longevity and optimal performance of your reel, regular maintenance is crucial. In this section, we will discuss important maintenance tips that will help you keep your reel in excellent condition.
Clean the Reel After Each Saltwater Fishing Trip
One of the most important maintenance tasks for saltwater fishing reels is to clean them thoroughly after each outing. Seawater is highly corrosive, and if left on the reel, it can lead to rust, damage to internal components, and reduced performance. Use freshwater and a soft cloth or sponge to wipe down the exterior, paying attention to areas where salt and debris tend to accumulate. Rinse the reel with freshwater and allow it to air dry completely before storing.
Check for Signs of Wear or Damage Regularly
Regular inspections of your saltwater fishing reel are essential to catch any signs of wear or damage early on. Examine the reel’s body, spool, handle, and other components for any cracks, dents, or loose parts. Inspect the bail, drag system, and gears for smooth operation. If you notice any issues or abnormalities, address them promptly to prevent further damage and ensure the reel’s proper functioning.
Apply Reel Lubricant Periodically
Reel lubrication is crucial for maintaining smooth operation and preventing excessive wear and tear. Periodically apply reel lubricant as recommended by the manufacturer to the gears, bearings, and other moving parts. Lubrication reduces friction, enhances casting distance, and prolongs the life of your reel. However, be mindful not to over-lubricate, as it can attract dirt and debris.
Avoid Excessive Exposure to Saltwater
While saltwater is the natural environment for sea fishing, excessive exposure can be detrimental to your reel. Whenever possible, avoid submerging the reel in saltwater unnecessarily. When fishing, rinse the reel with freshwater periodically to remove salt and debris. Additionally, after each fishing trip, store your reel in a cool, dry place to minimise the risk of saltwater corrosion.
By following these maintenance tips, you can significantly extend the lifespan of your reel and ensure its optimal performance on future fishing adventures. Regular cleaning, careful inspections, proper lubrication, and minimising exposure to saltwater will keep your reel in top shape, ready for countless successful fishing experiences.
Remember, a well-maintained reel not only enhances your fishing performance but also protects your investment for years to come. Take the time to care for your reel, and it will reward you with exceptional performance and lasting durability.
Summary
Saltwater fishing reels are valuable tools that require diligent care to ensure their longevity and optimal performance. In this part, we have explored the comprehensive process of cleaning them, highlighting the importance of regular maintenance. Now, let’s conclude by emphasising the significance of regular cleaning and maintenance in extending the lifespan of your reels.
Importance of Regular Cleaning and Maintenance
Protecting Against Corrosion
Regular cleaning is crucial in safeguarding saltwater fishing reels against corrosion. Seawater is highly corrosive and can gradually eat away at the reel’s components, leading to irreversible damage. By cleaning your reel after each fishing trip, you remove salt, dirt, and debris that could promote corrosion. This proactive measure significantly reduces the risk of corrosion-related issues and prolongs the reel’s lifespan.
Preserving Optimal Performance
Proper care through regular cleaning and maintenance ensures that your sea fishing reel maintains optimal performance. Salt, sand, and other contaminants can accumulate inside the reel, affecting its functionality. By keeping the reel clean, you prevent these particles from interfering with its smooth operation. Regular maintenance also allows you to identify and address any potential issues promptly, ensuring the reel performs at its best during your fishing adventures.
Proper Care Extends the Lifespan of Saltwater Fishing Reels
Preventing Wear and Tear
Regular cleaning and maintenance routines help prevent excessive wear and tear on your reel. Dirt, salt, and debris can cause friction and strain on the reel’s moving parts, leading to accelerated wear. By cleaning the reel and applying lubricant as needed, you minimise the chances of premature component failure and extend the overall lifespan of the reel.
Addressing Damage and Malfunctions
Through regular maintenance, you can identify and address any damage or malfunctions in your reel promptly. Regular inspections allow you to detect worn-out parts, loose screws, or other issues that could compromise the reel’s functionality. By addressing these problems early on, you can prevent further damage and ensure the reel continues to perform reliably for years to come.
Promoting Longevity and Value
By investing time and effort in regular cleaning and maintenance, you increase the longevity of your saltwater fishing reel and protect your investment. Rather than replacing reels frequently due to neglect or damage, proper care allows you to enjoy your reel for an extended period, maximising its value and ensuring a more cost-effective fishing experience.
In conclusion, the importance of regular cleaning and maintenance cannot be overstated when it comes to saltwater fishing reels. By protecting against corrosion, preserving optimal performance, preventing wear and tear, addressing damage promptly, and promoting longevity, regular care significantly extends the lifespan of your reel. Make it a habit to clean your reel after each saltwater fishing trip, conduct regular inspections, and address any issues promptly. By doing so, you can enjoy many more successful and memorable fishing adventures with a reel that performs reliably for years to come.